
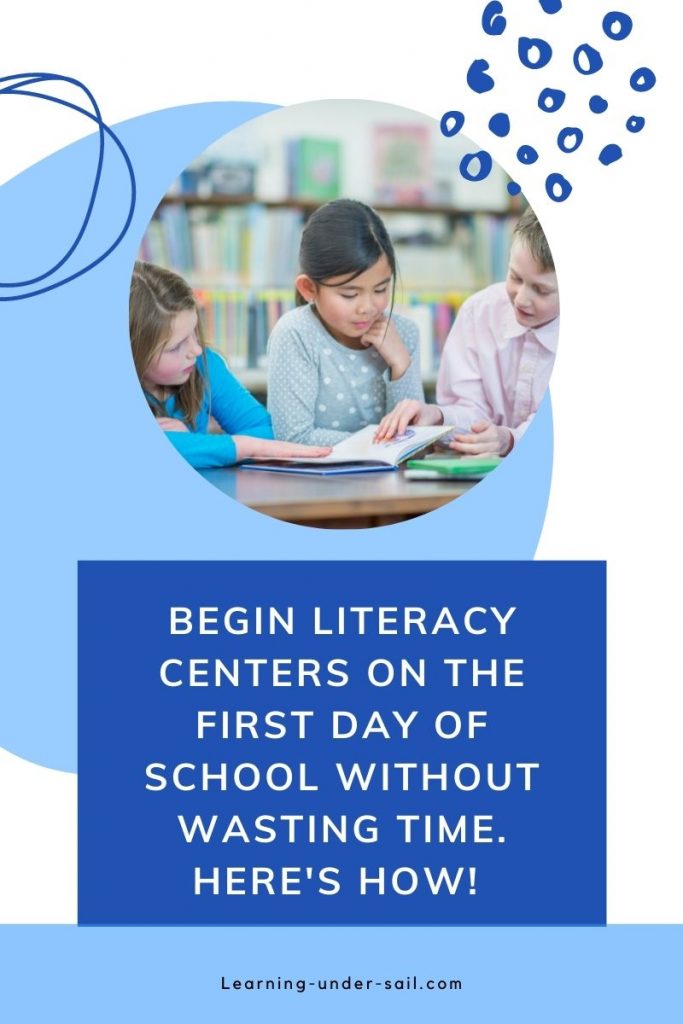
Are you wondering how to set up literacy centers quickly and efficiently this year? Well-run literacy centers are the key to getting your reading groups up and running without a headache. Set yourself and your students up for reading success on the first day of school! Eliminate serious classroom management challenges by properly training your class the rules and expectations of literacy centers before you attempt to teach small reading groups.
You can’t start reading groups the first week of school, but you can start teaching the rules, expectations, and procedures of literacy centers. Here is your 9-day guide to have literacy centers up and running properly in two weeks. Spend more valuable time with your small group readers while the rest of the class is engaged in authentic reading and active reading skills practice.
Here’s your 9-day guide that explains how to set up literacy centers on the first day of school so you can begin small reading groups in earnest the third week of school.
Literacy Center Menus
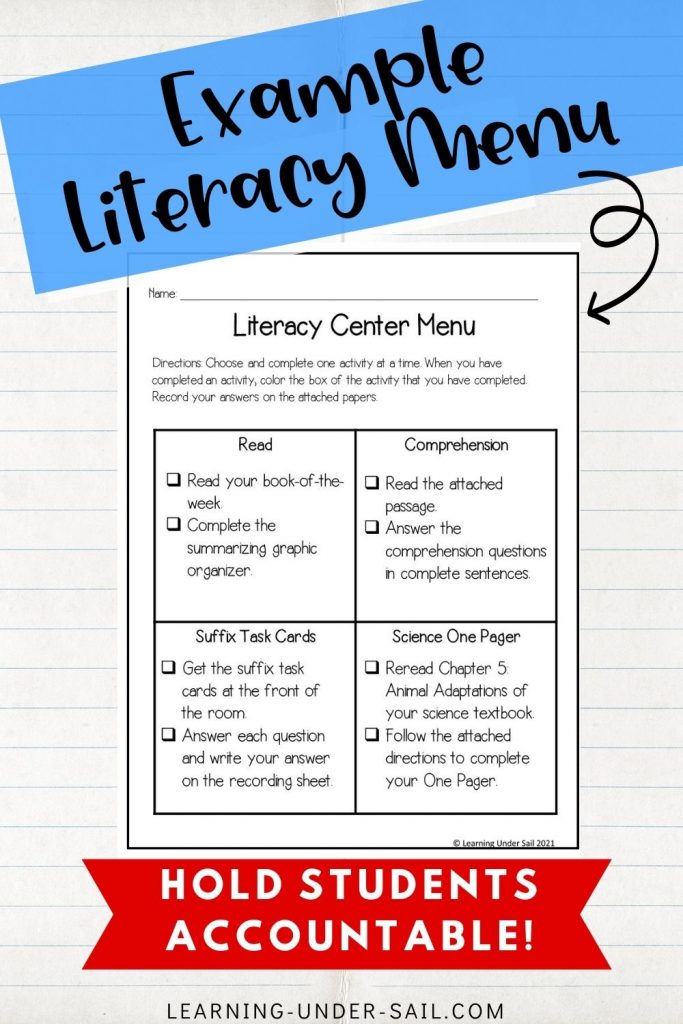
I use a literacy center menu for all of my students’ independent reading work. A literacy center menu is basically a chart of activities that students are responsible for completing by the end of the week. The activities I include in my literacy center menus must be authentic and engaging while still allowing students to complete activities independently. Some examples of activities that I include on my menu include a short grade-level nonfiction reading passage with open-response questions, a reading skill-based worksheet that requires cutting, gluing, or coloring, a student self-selected book with a reading response, and an extra literacy activity such as a one-pager for science or task cards that are focused on a reading skill.
Read more about literacy center menus and how to create them here.
Day 1 – Introduce the literacy menu
Begin by handing out and explaining the menu checklist. Students won’t be able to complete any work without the supporting activities. If they only have the menu checklist in front of them you are more likely to have their full attention.
After explaining the menu checklist, choose one activity from the menu. The cut and paste activity or coloring activity are usually great choices for the first day of school because everyone gets to use their new school supplies.
How to Teach a Worksheet
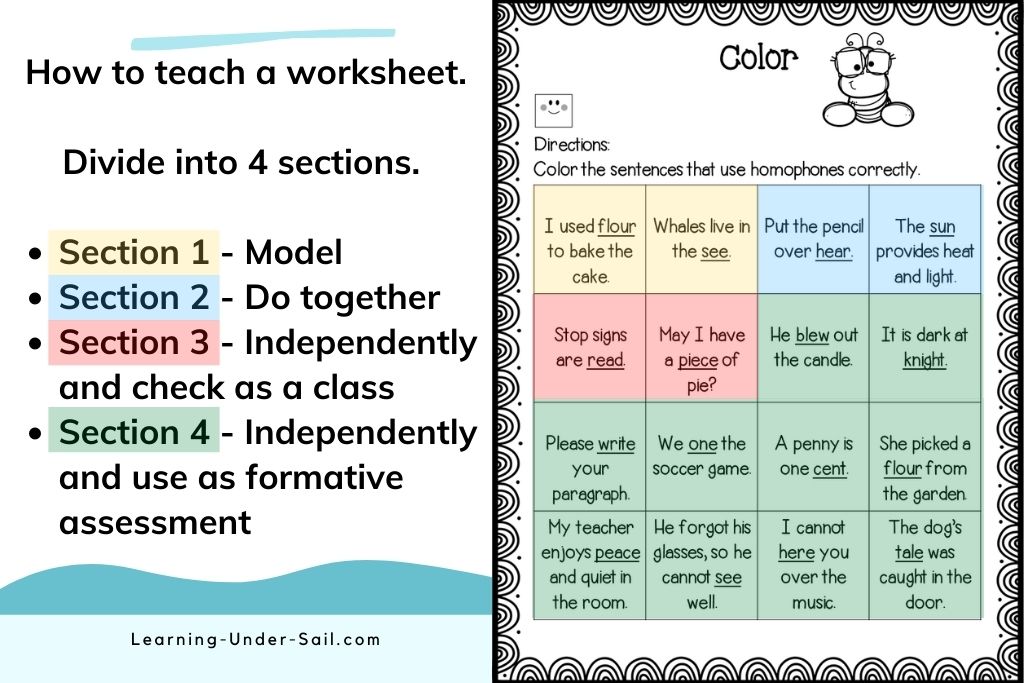
When I teach how to do a new activity using a worksheet I divide it into four sections. These sections do not need to be equal.
Section 1 – I model the strategy I use by thinking aloud how to complete this first part of the activity.
Section 2 – As a class, we work through this section together and discuss how we know what to do and how we know we have the correct answer.
Section 3 – Students work independently, then we discuss the correct answers as a class and answer any questions that students may have.
Section 4 – Students complete this section independently, and I can use this section for formative assessment.
After we have completed our first activity, we color the appropriate section of our menu and put our activity and menu in our literacy folder. I prefer to have students keep their literacy folders in their desks, but some teachers prefer to keep all of the literacy folders in a separate location. Whichever procedure you choose, teach students where you expect their literacy folder and activities to be during the week.
Day 2 – Teach a comprehension activity from the literacy menu
On day 2, I teach a comprehension activity. I like to use a short, grade-level passage with open response questions to each of my literacy center menus. If you are short on time, make this activity your reading lesson for the day.
Begin literacy center time today with a literacy folder check. Everyone should have their literacy folder, literacy menu, and yesterday’s activity. Before handing out today’s activity review the remaining three choices on the literacy menu and model pointing out that you completed the activity that you started yesterday, so you are ready to choose a new activity today. Today you choose the comprehension activity.
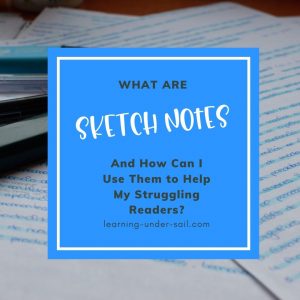
Once all students have a copy of the comprehension activity, model the prereading and reading strategies that you expect your students to use with all comprehension passages. My school focuses on sketch noting. I teach my students that I expect them to have at least three sketches that show me that they have read the text. In the future, when students are working independently, I will do a spot check for these sketches throughout the week by having students bring their menus to small group reading for literacy center check-in. Learn more about sketch noting here.
After reading the passage with students, we move on to answering the open-response questions and I teach them how to justify their answer in the text. I use the same four-section method mentioned above.
Then we go back to the literacy menu, color the activity that we finished on our main menu page, and store all of our papers in our literacy folder.
Day 3 – Focus on literacy center rules
By day 3, we only have two activities left on the literacy menu. We begin literacy center time with another folder check and a review of our activity choices. Continue to point out that we are moving on to the next activity because we have finished the activity that we started yesterday.
The focus of day 3 is more about behavior during literacy centers than how to do literacy centers. Introduce the rules of literacy centers. Here are the rules for my class:
- Work quietly
- Solve your problem without the teacher’s help
- You may work in groups of 2 or 3.
I like to keep the rules simple, but it takes a while for students to understand each of the rules. We take a little time to talk about what each rule looks like when students are following the rule and what it looks like when students are not following the rule. Sometimes I get students to act out what rules look like and don’t look like. It is also important to discuss why these rules are in place. We need our classroom to look and sound a certain way so that everyone in it can learn and do their best.
After going over the rules, I hand out the third activity. This should be some type of reading skill-based cut and paste or coloring activity. Students practice using the literacy center rules to work during literacy center time as the teacher provides feedback about their behavior.
This is a great day to see if students remember what to do when they are finished with an activity and where to place their papers and their folder.
Day 4 – Introduce the classroom library and reading response activity
This is the day that I introduce the classroom library and a reading response activity from the literacy menu. If you don’t have a classroom library check with your media specialist to arrange a time for students to check out self-selected books.
Although there are many different ways to set up classroom libraries, I prefer to sort my books by genre. Since it’s still the first week of school, students self-select books based on interest only. Once we begin small group reading, they will also choose books on their level.
Before I have students check their literacy center menu for the day, all of the students select a book from the classroom library and read for about 10 minutes. After 10 minutes, I have them stop and put their book to the side.
Then I model choosing a book and I read it aloud to the class. Next, I model completing my reading response activity. My favorite beginning reading response activity is 3-2-1. I model writing three events in my story (or three facts for nonfiction), two things I found interesting in the text, and one thing that I am still wondering. Find more simple reading response activities in this article from Scholastic, The Best 5-Minute Reading Responses.
After I modeled completing the 3-2-1 reading response, students take out their literacy menus and check to find out which activity they still need to complete. I hand out the reading response sheets and students complete them independently based on what they have read. They should still be able to finish this activity if they haven’t finished their book.
Finally, we check our menus to make sure that they are complete. I show students where to turn in their literacy menu.
My district always starts the day after Labor Day, so this ends our first four-day week of school.
Day 5 – Introduce a whole literacy menu
New week, new literacy menu. The menu this week includes:
- Short grade-level passage with open response questions
- Reading response activity to go with a student self-selected book
- Reading skills worksheet with cutting, gluing and/or coloring
- Task Cards
Task cards are new this week. I keep my task cards in one central location. Students can either work at that location or take the cards back to their desks. Most weeks I will only have one set of task cards available. Since we’re still learning how to do literacy centers, I have 6 or 7 of the same set of cards available.
This week, I give students the whole menu packet and allow them to have more choices, although I still don’t turn them loose with their literacy menu, yet.
We begin literacy center time by reviewing the rules. If we had any trouble last week, I make sure that we take the time to act out the rules that need some extra attention. Then, I hand out the literacy menus and we review the activities.
After reviewing the choices, I explain that we are all going to “choose” the comprehension activity today. I use the same process that I used to teach this activity on day 2, except this time students read the passage and create their sketch notes independently. Once students have completed their sketch notes, we share our ideas as a class and discuss the passage. Then we answer the questions and justify our answers.
Finally, we color in our menu chart and store our papers in our literacy folders.
Day 6 – Introduce the task card center
On day 6 I introduce the task card center. I begin by reading the directions on the literacy center menu. Then I pretend I’m a student and model asking another student if they want to work in the task card center, going to the task card center to get the materials, asking the other student if she wants to work on the carpet or at a desk, and getting out the task cards. This is the center where most students work together in pairs of two or teams of three, so I make sure that I model how to work together with my partner. Not how to do all the work and have my partner copy off my paper.
Next, I explain that working with a partner is always a choice. If you would like to do the task card center by yourself, you can choose a different activity to do today and do the task card activity later in the week when there are more sets of cards available.
I let the students work and give feedback as needed.
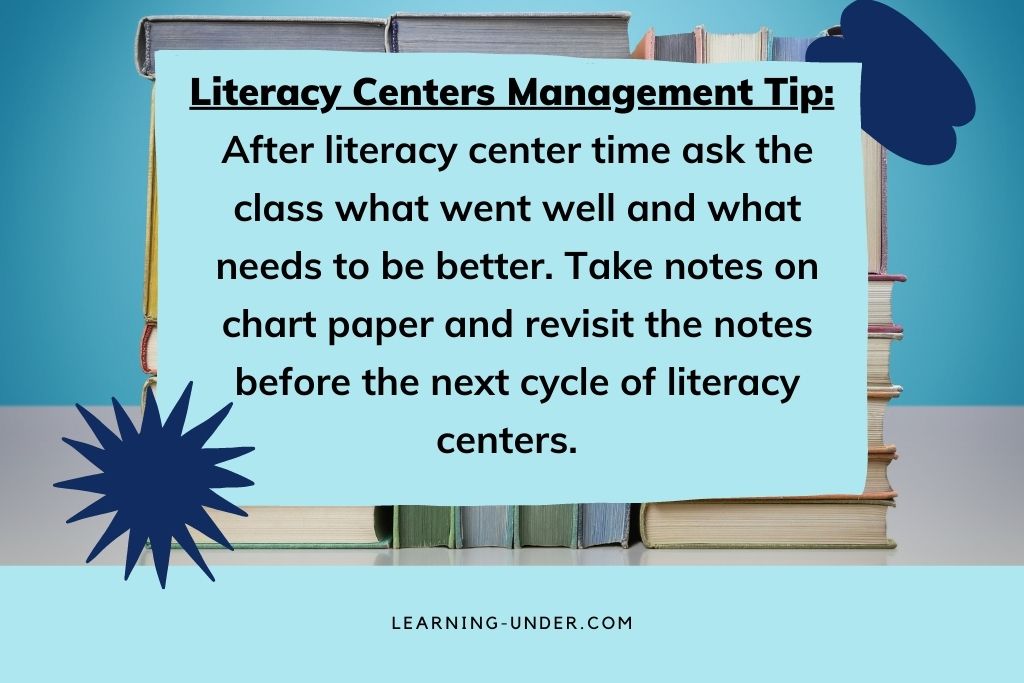
At the end of literacy center time, we talk about what went well and what we need to work on tomorrow. It is helpful to keep a class note on chart paper where everyone can see it to check in with ourselves tomorrow.
Day 7 – Focus on independent student choice and quality of work
At the beginning of Day 7, we revisit our notes from yesterday about what went well and what we need to work on today. At this point, everyone needs to finish the activity that they started yesterday or choose a new activity. I let students make their literacy choice and get started. Then, I monitor and give feedback.
At the end of literacy center time, we do another debrief. We take some class notes about what went well and what we can improve upon tomorrow.
Day 8 – Focus on student behavior during literacy centers
Day 8 is basically a repeat of Day 7. If the class gets too out of control at any point I have them work independently. This can also be a logical consequence for specific students who need a little extra monitoring.
Day 9 – Teach what to do when the literacy center menu is finished
On Day 9 most students should be done with their literacy center menu. This is a great time to teach students what to do when they have finished their literacy center menu. I usually have logic puzzles and literacy games available for students who have finished their work. Students can also choose to read a book when they have finished.
At the beginning of the year, I teach my students how to play basic games like Go Fish!, Memory, and Old Maid. Then I turn these basic cards games into literacy games by using different sets of playing cards.
There is usually enough time to teach two simple games during literacy center time. I use regular decks of cards to teach both Memory and Go Fish! Read more about how to turn these games into literacy games and get some free printables here.
That wraps up my step-by-step plan of how to set up literacy centers up on the first day of school.
Need more ideas for how to set up literacy centers in your classroom? Check out these articles:
How to Master Literacy Centers With This Powerful Strategy (hint: literacy center menus)
Reading Centers for Upper Elementary
What’s your biggest intervention challenge? I’d love to help! Tell me in the comments below.


One Response